Uploading a custom logo to your Secure Privacy design replaces the default logo in your cookie banner and preference center — ensuring consistent, branded presentation that blends with your website's visual identity. This guide walks through the upload process in three steps.
Who Is This For?
Website administrators and designers personalizing the Secure Privacy cookie banner with their organization's logo
Compliance teams ensuring the cookie consent UI matches their website's brand identity
Anyone setting up a white-labeled consent experience using Secure Privacy's custom logo feature
How to Upload a Custom Logo
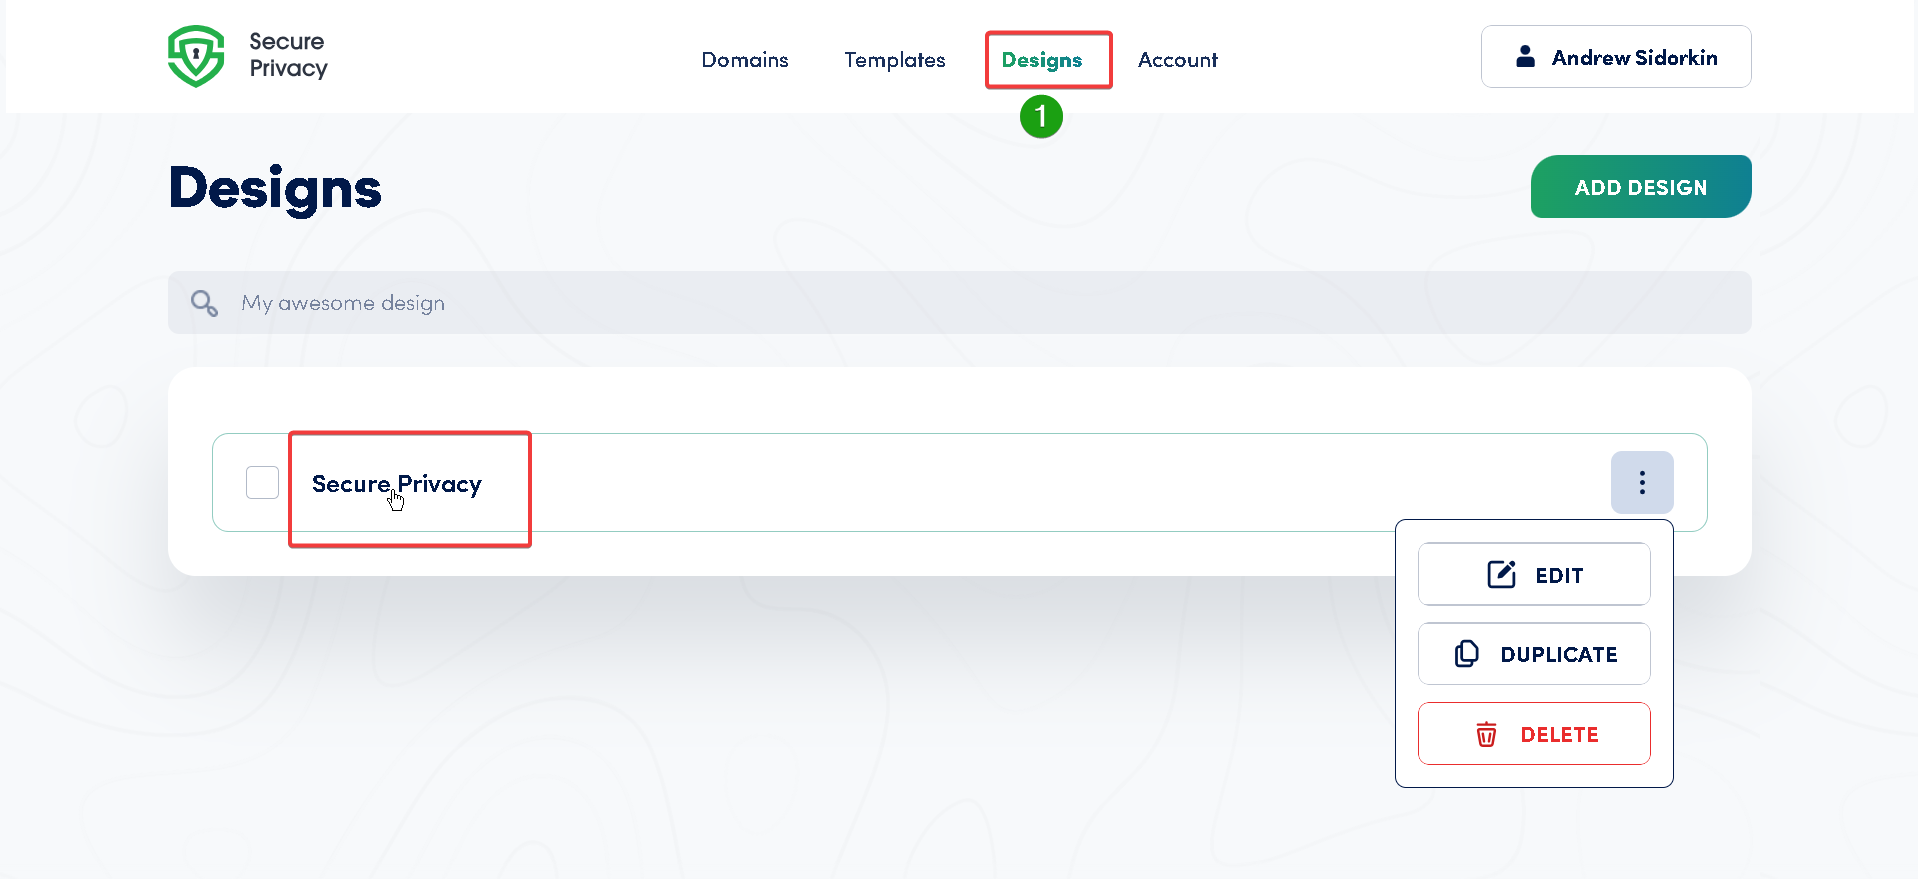
Step 1: Access the Designs page
Log in to your Secure Privacy account.
Navigate to the Designs page from the top navigation bar.
Search for or select the design you want to modify with a custom logo.
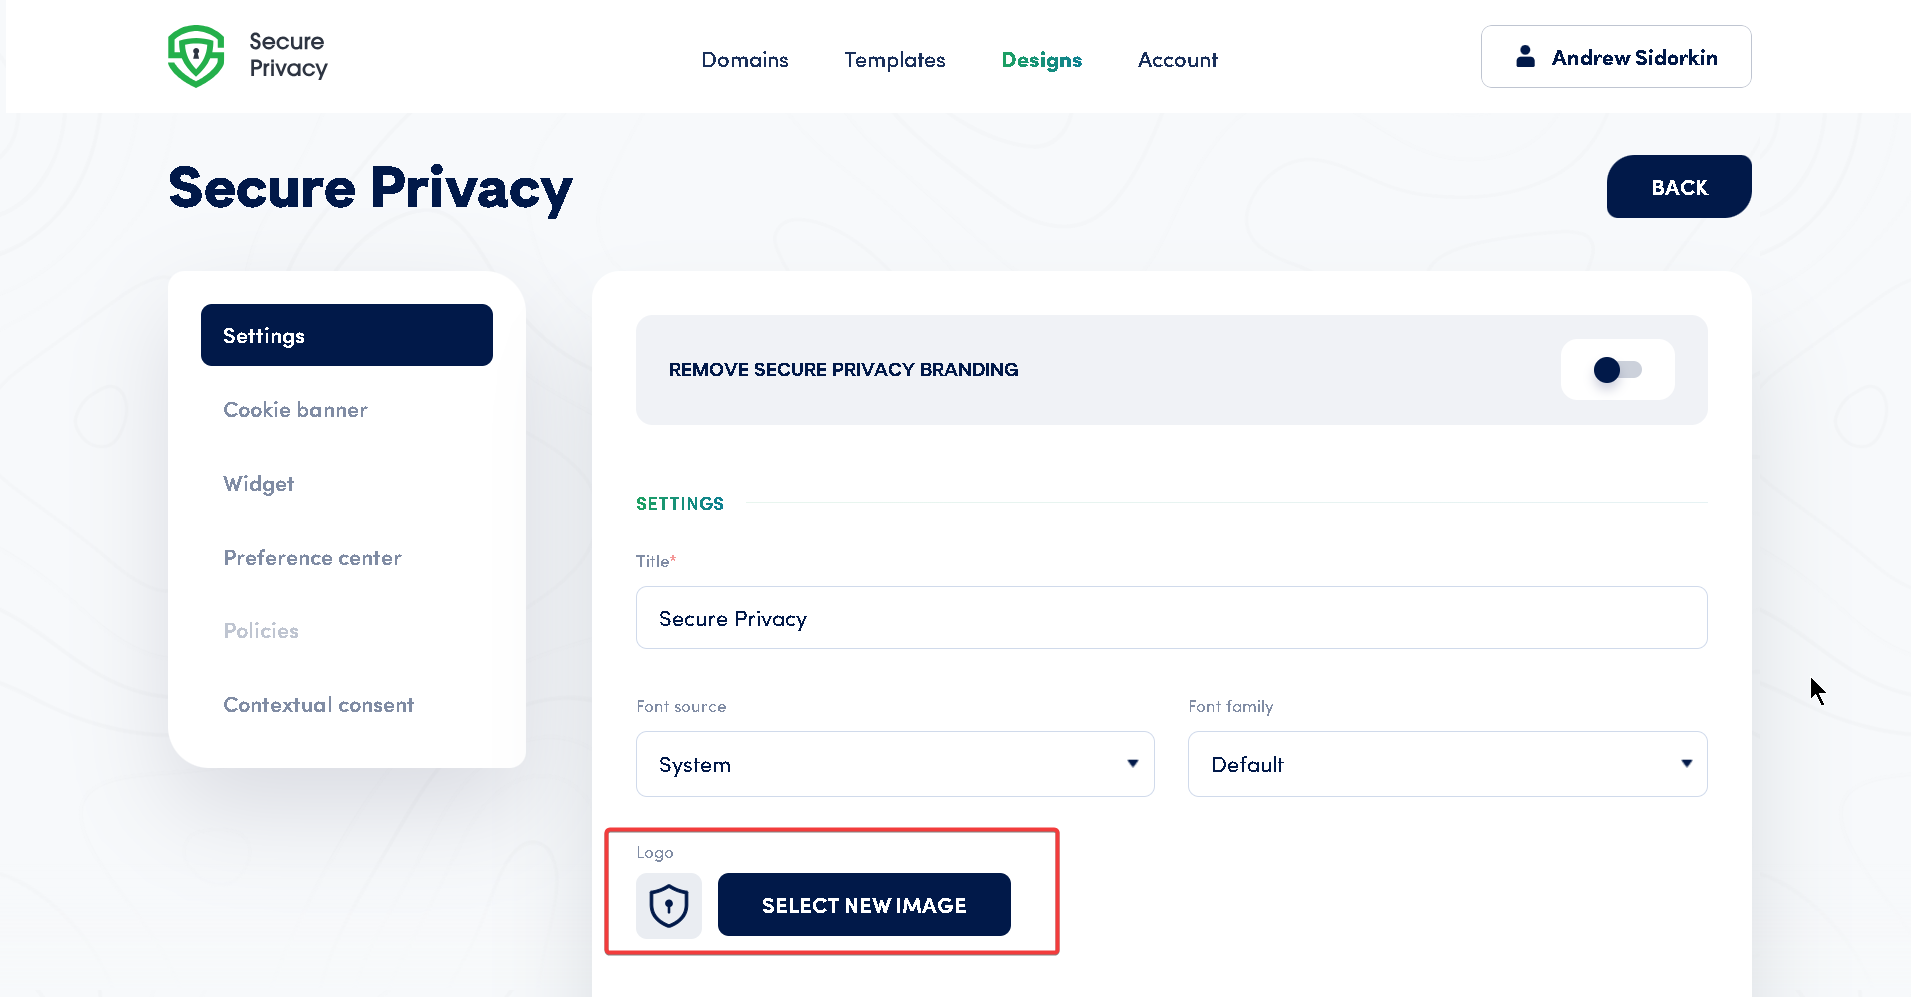
Step 2: Upload your logo
Within the selected design, open the Settings tab and locate the Logo section.
Click Select new image.
In the file selection dialog, locate and select your logo file.
Ensure the file is in PNG or JPG format and approximately 100px × 100px in dimensions for best results.
Click Upload and wait for the upload to complete.
Step 3: Verify the logo upload
After the upload completes, a preview of your logo will appear in the Logo section — confirm it displays correctly.
Check that the logo appears as expected in the banner preview across desktop, tablet, and mobile.
Note: Due to CDN caching, you may not see the updated logo immediately on your live site. If the new logo is not appearing, try viewing the site using a VPN with a different location, or clear your browser cache and reload.
Your custom logo will now replace the default Secure Privacy logo in the cookie banner and preference center on all assigned domains.
Frequently Asked Questions
What file formats and dimensions are supported for the custom logo?
The custom logo must be in PNG or JPG format. For best results, use an image approximately 100px × 100px — this ensures the logo renders clearly across the cookie banner and preference center without distortion or excessive white space.
Why is my updated logo not showing on the live site?
CDN caching may delay the logo update from appearing immediately. To verify the upload was successful, check the preview in your Designs settings. To see the live change sooner, try accessing the site from a different location using a VPN, or clear your browser cache and hard refresh the page.
Can I use different logos for different domains?
Yes. Logos are configured at the design level — if you have separate design configurations assigned to different domains, you can upload a different custom logo to each design independently.