When implementing Google Tag Manager (GTM) consent management, ensuring that tags and triggers respect user cookie consent is essential for GDPR, ePrivacy, and other privacy-regulation compliance. This guide walks you through how to block cookies in GTM triggers by adding a consent condition — preventing any tag from firing until explicit user consent has been collected by your Consent Management Platform (CMP).
Who Is This Guide For?
GTM administrators responsible for tag governance and consent compliance
Web developers implementing tag management and cookie-blocking logic
Digital marketers managing analytics, advertising, and tracking tags under consent requirements
How to Block Cookies in GTM Triggers Based on User Consent
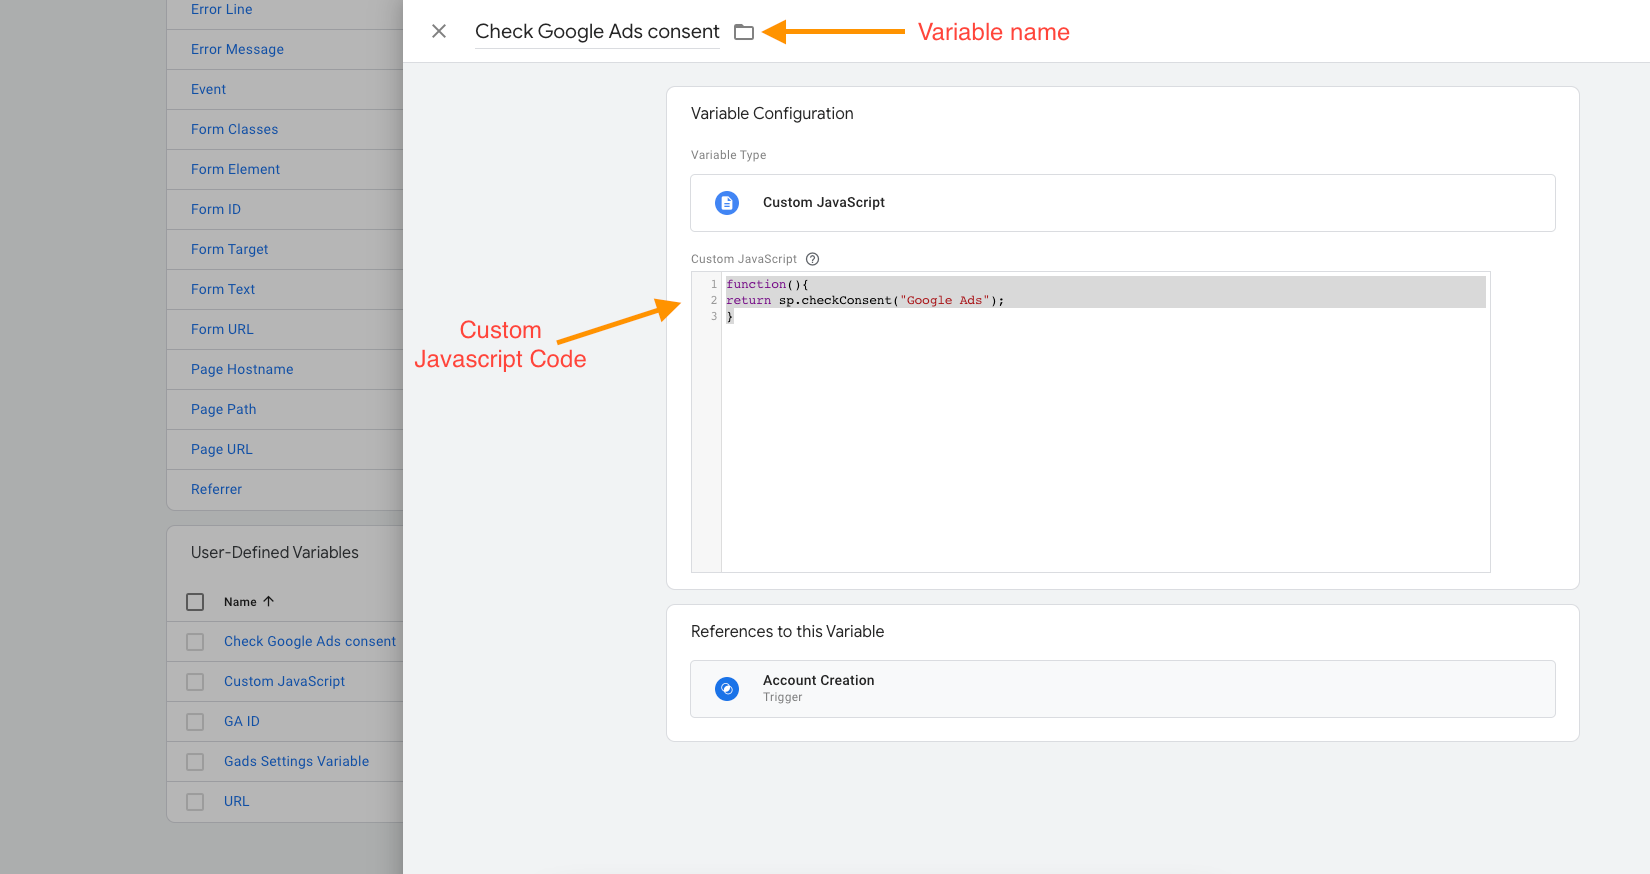
Step 1: Create a User-Defined Variable for the Consent Check
In GTM, go to Variables > New.
Name the variable using the format:
Check [Plugin_name] consentNote on placeholders: Throughout this guide,
[Plugin_name](square brackets) denotes a value you replace with your actual service or plugin name. Do not use double curly braces ({{ }}) in variable names or code you author — GTM will interpret that syntax as a live variable reference and fail to resolve it.Set Variable Type to Custom JavaScript.
Enter the following code, replacing
[Plugin_name]with your exact service name:function() { return sp.checkConsent("[Plugin_name]"); }The plugin name is case-sensitive — match it exactly as it appears in your CMP or cookie scan report, for example - for the service "Google Analaytics" it would look like this -
function() {
  return sp.checkConsent("Google Analaytics");
}
Save the variable.
Step 2: Verify the Plugin Name Matches Your CMP
Copy the service or plugin name directly from your cookie scan or CMP dashboard to avoid typos.
Confirm spelling and capitalisation match exactly — a mismatch will cause the consent check to always return
false.
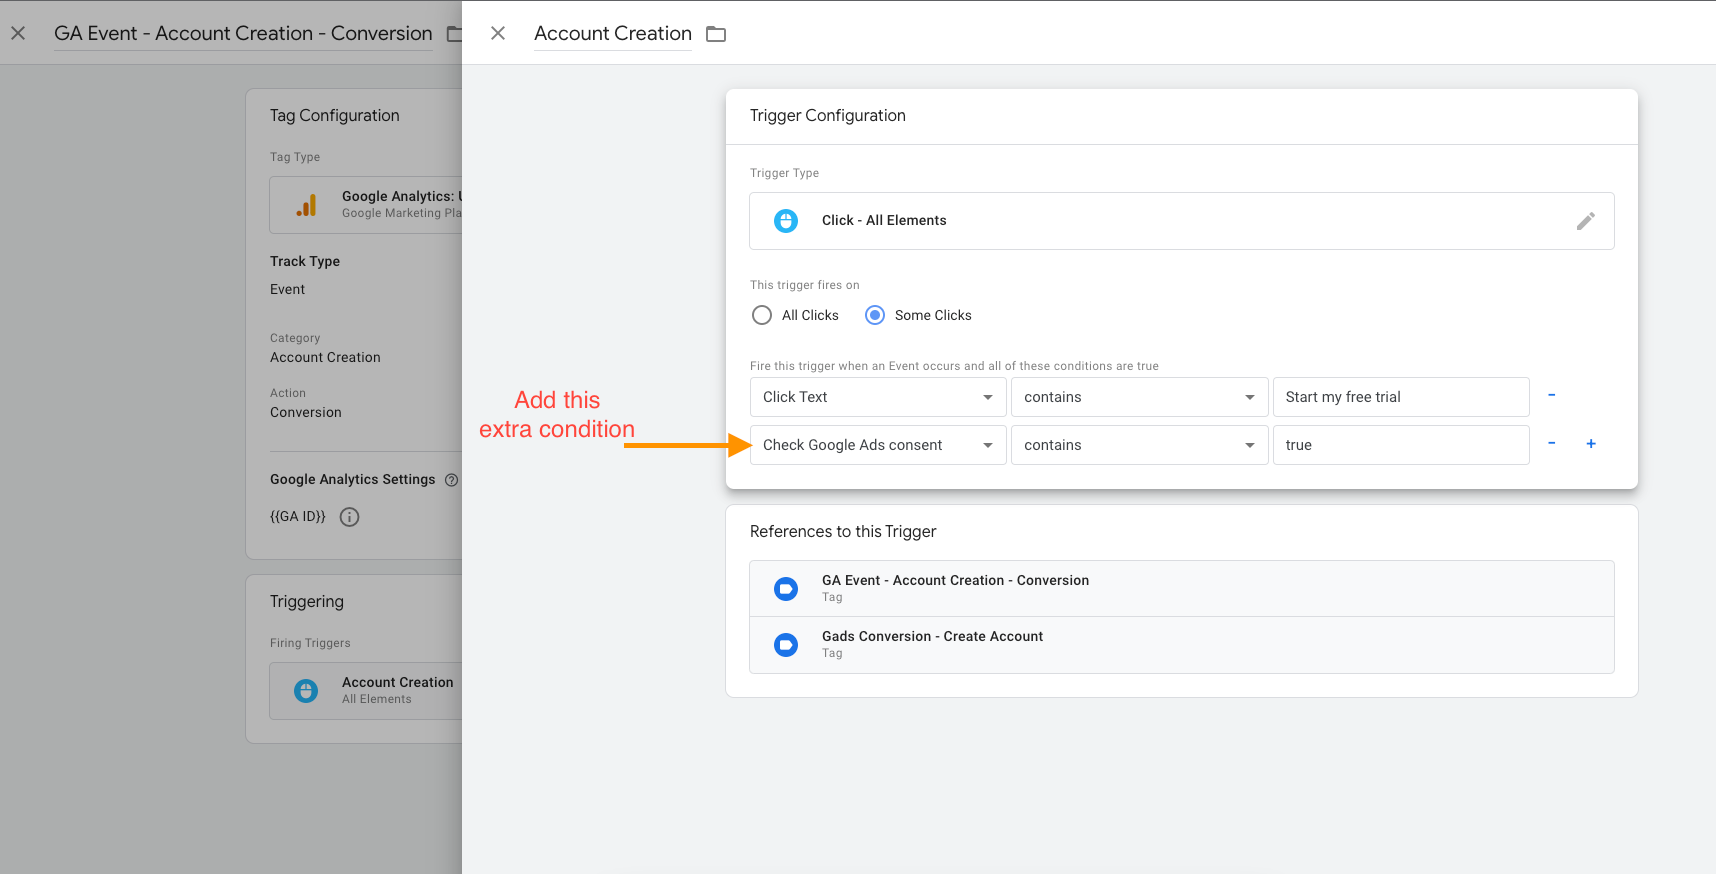
Step 3: Add the Consent Condition to Your GTM Trigger
Navigate to Triggers in GTM.
Open the trigger you want to gate (e.g., a custom event trigger or click trigger).
Add a new trigger condition using the variable you created:
Check [Plugin_name] consent — equals — trueThis condition ensures the trigger — and any tag attached to it — only fires when the user has granted consent for that specific service.
Step 4: Publish Your GTM Container
Save the trigger and publish your GTM container. Tags governed by this trigger will now respect user consent: cookies are blocked and tags remain dormant until the user actively consents through your CMP.
Frequently Asked Questions
My tag still fires without consent — what could be wrong?
Confirm the plugin name inside
sp.checkConsent("[Plugin_name]")matches your CMP entry exactly, including capitalisation.Verify the Custom JavaScript variable returns a strict boolean
trueorfalse— not a string or undefined value.Check that all trigger conditions evaluate to
truesimultaneously; a single failing condition will prevent the trigger from firing correctly.Ensure you have not used
{{ }}double-curly-brace notation in your variable code or name, as GTM will try to resolve this as a built-in variable reference.
How do I test whether the consent condition is working in GTM?
Use GTM Preview Mode to inspect which triggers fire and which are blocked in real time.
Toggle consent on and off in your CMP and confirm the tag fires only when consent is granted.
Check the Variables pane in Preview Mode to confirm your consent variable returns the expected boolean value.