Keeping your website GDPR-compliant isn't a one-time checkbox — cookies and third-party trackers change every time you add a plugin, run a new ad campaign, or update your tech stack. Many teams try to stay on top of this with manual cookie audits, browser extensions, or one-off spreadsheet reviews. The result is always the same: incomplete coverage, outdated reports, and the nagging uncertainty of not knowing what's actually firing on your site right now.
Secure Privacy's Scan Report feature solves this with automated, geo-specific website cookie scanning that produces audit-ready compliance reports on your schedule. You control where scans run from (US or EU), how often they run, which pages are included, and whether the scanner can reach authenticated, login-protected areas of your site — giving you a complete picture of your privacy compliance posture, not just the public-facing pages.
By the end of this guide, you'll have every Scan Report setting configured correctly for your domain, so you can run comprehensive cookie audits automatically and receive compliance reports without any manual effort.
Who Is This Article For?
This guide is for website owners, privacy officers, and developers who use Secure Privacy and want to:
Automate recurring GDPR cookie compliance scans for one or more domains
Ensure scan results reflect the correct legal jurisdiction (US or EU)
Exclude irrelevant or sensitive pages from compliance reports
Audit login-protected pages and member areas for hidden trackers
Receive automated email delivery of completed scan reports
Prerequisites
An active Secure Privacy account
At least one domain added and verified in your Secure Privacy dashboard
For Scan Behind Login: an Advanced or Enterprise plan subscription
How to Access Scan Report Settings
Step 1 — Log In to Secure Privacy
Log in to your Secure Privacy account using your credentials.
Step 2 — Open the Domains Section
In the main navigation, go to the Domains section and select the specific domain for which you want to configure Scan Report settings.
Step 3 — Navigate to Reports › Scan Report
Under the Reports section in the domain menu, click Scan Report to open the scan report overview page.
Step 4 — Open the Settings Tab
On the Scan Report overview page, click the Settings tab to access all configurable scan and reporting options.
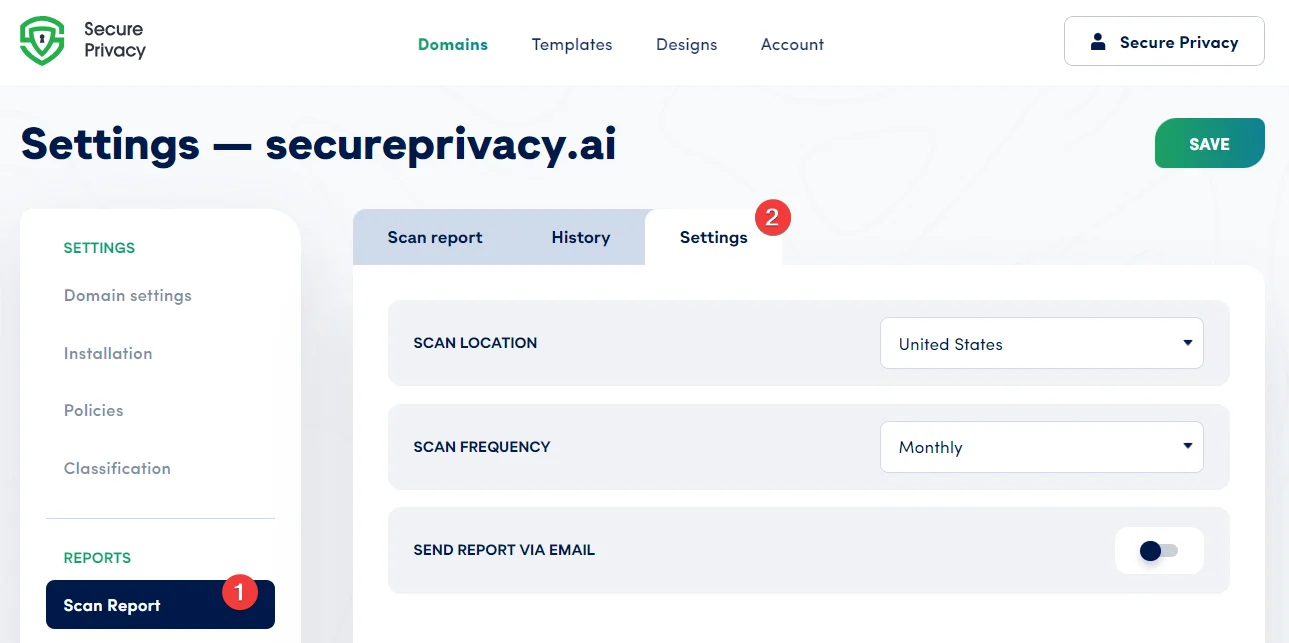
The Scan Report overview page — click the Settings tab to access all configuration options.
Scan Report Configuration Options
The Scan Report Settings page gives you precise control over how cookie and tracker scans are conducted and how compliance results are delivered. Each setting is described in detail below.
Scan Location — Choose US or EU for Geo-Specific Compliance Results
This setting lets you specify the geographic location from which Secure Privacy performs website scans. You can choose between the United States (default) and the European Union (Germany). Selecting a scan location that matches your primary audience or legal jurisdiction — for example, choosing EU (Germany) for GDPR-focused audits — ensures your compliance reports reflect the cookies and trackers that actually load for users in that region, since some third-party scripts behave differently based on visitor location.
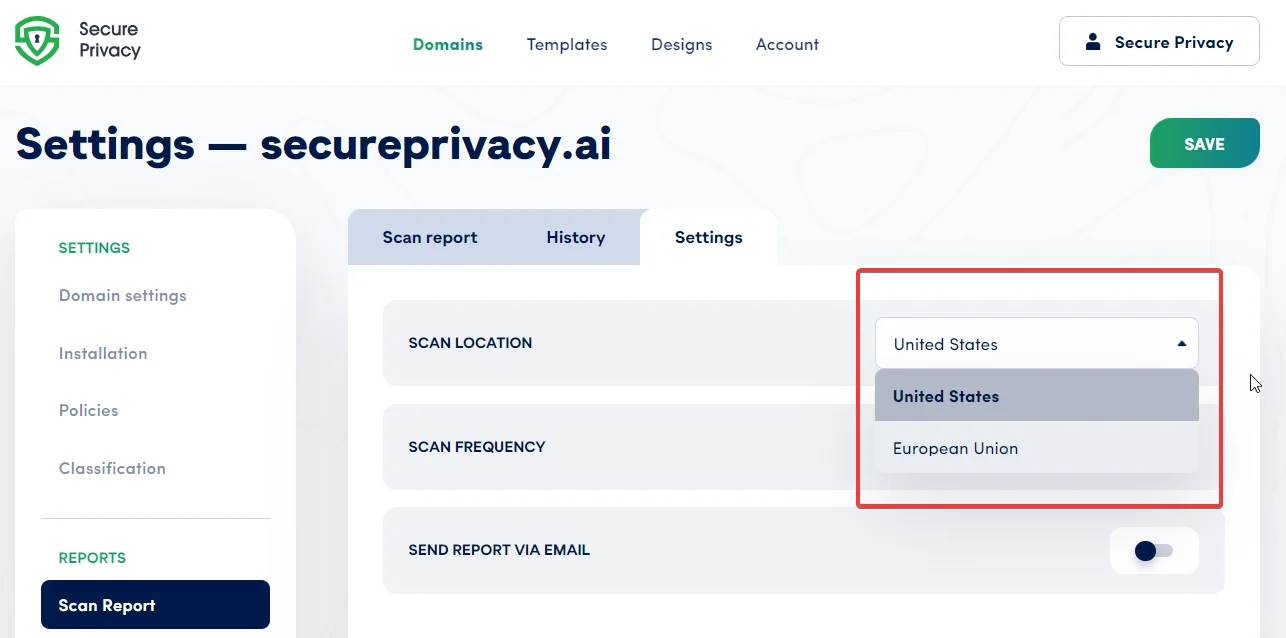
Scan Location options: United States (default) or European Union (Germany) for GDPR-region scanning.
Scan Frequency — Automate Monthly Cookie Audits or Scan on Demand
This setting controls how often automated cookie scans run for your domain. You can choose between a monthly automated scan — recommended for most organizations to catch newly introduced trackers as your website evolves — or a manual scan that you initiate on demand. Monthly scanning is particularly valuable if your site regularly adds new plugins, advertising scripts, or third-party integrations that could introduce undisclosed cookies.
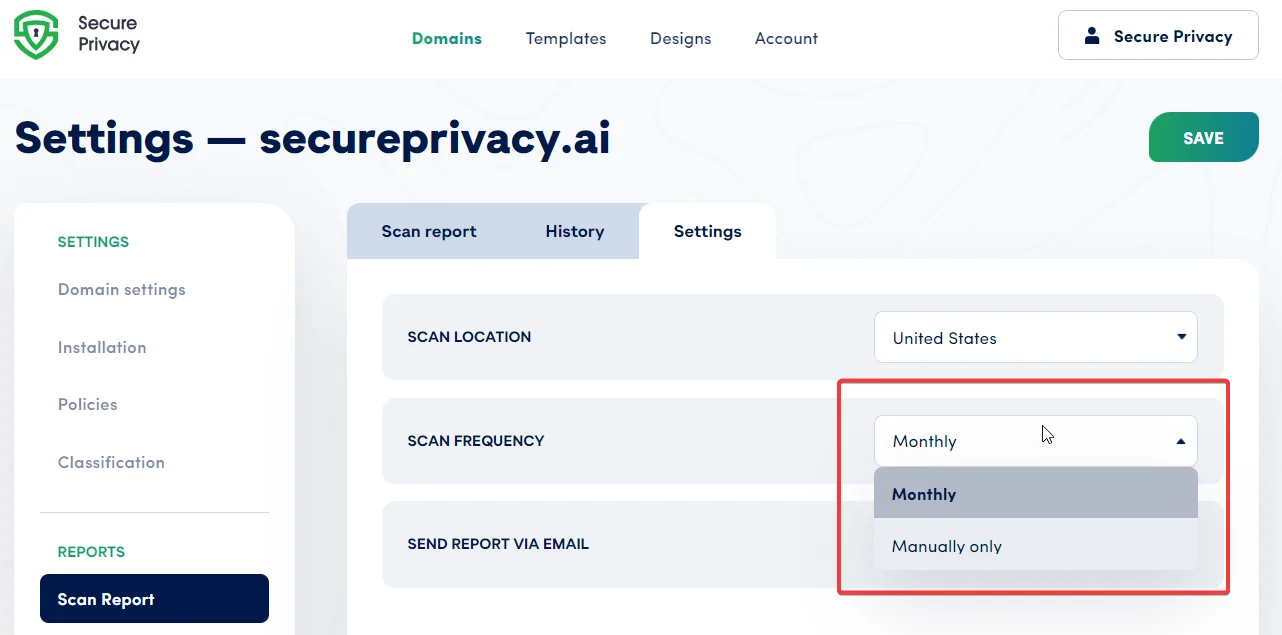
Choose between monthly automated scanning or manual on-demand scans.
Send Compliance Report via Email — Automated Delivery on Scan Completion
This toggle enables or disables automated email delivery of completed scan reports. When enabled, each completed scan report is sent directly to the email address associated with your logged-in Secure Privacy account. This is useful for keeping privacy officers, compliance managers, or developers automatically informed without requiring them to log in to the dashboard after every scan.
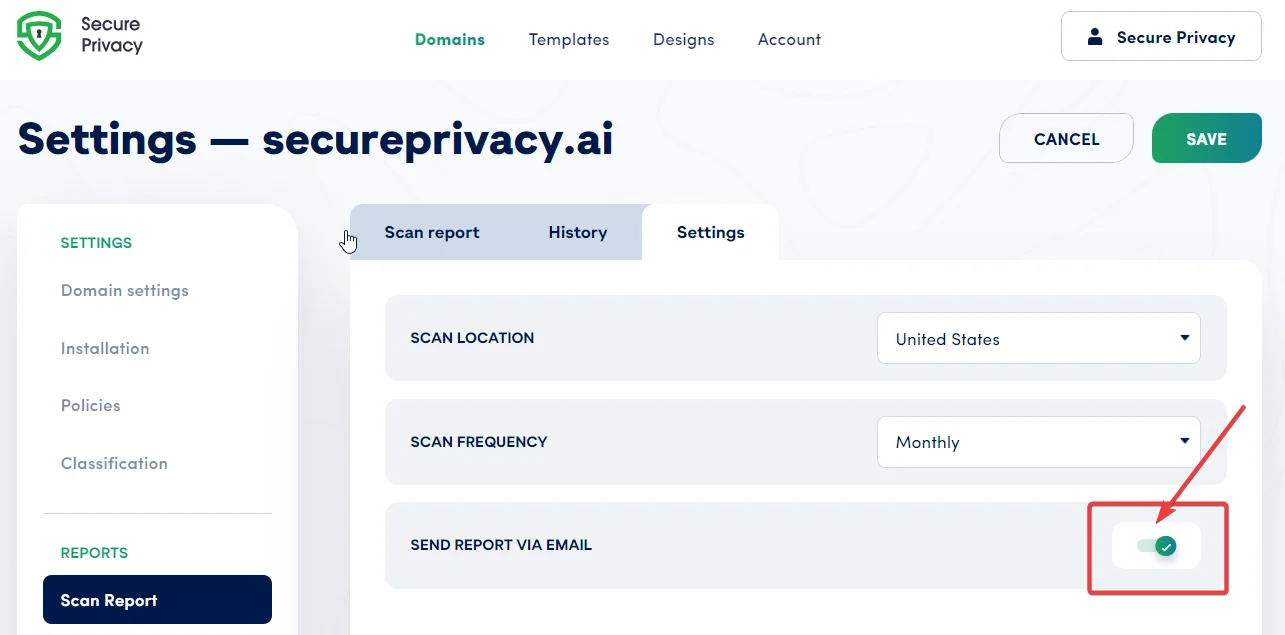
Enable the email toggle to receive automated compliance report delivery after each scan completes.
Include or Exclude Specific Pages from Cookie Scans
You can precisely control which pages of your website are included in or excluded from the cookie scanning process. This is useful when certain pages contain sensitive content, require authentication that you're handling separately, or are simply not relevant to your compliance reporting scope. Enter the URLs you wish to include or exclude in the field provided — multiple URLs must be comma-separated.
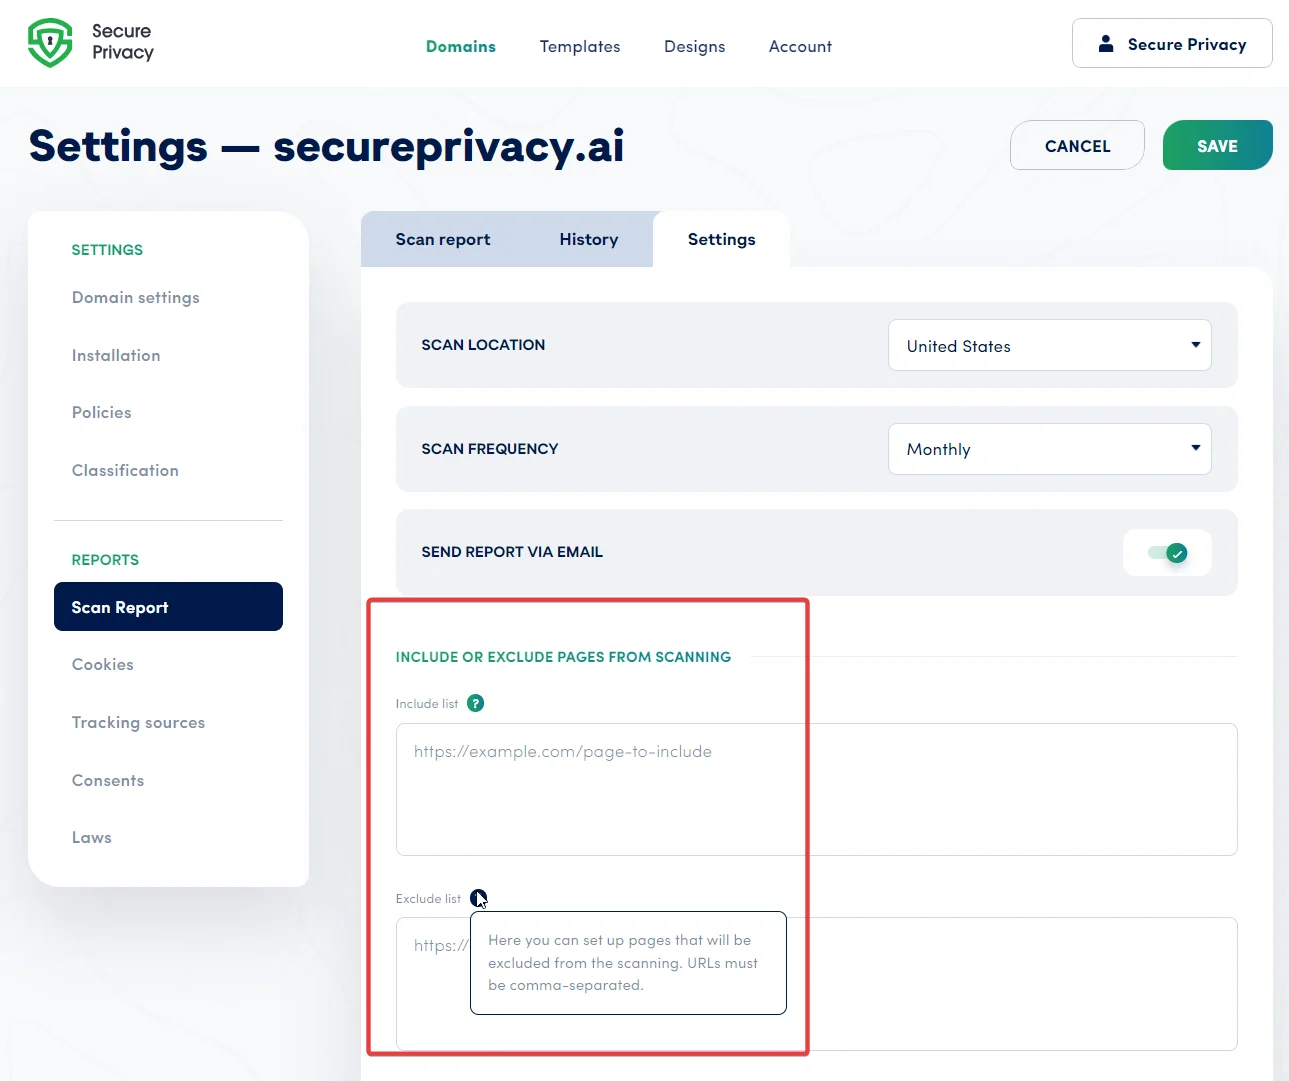
Enter comma-separated URLs to include or exclude specific pages from your cookie compliance scans.
Scan Behind Login — Audit Authenticated Pages and Member Areas
The Scan Behind Login feature enables Secure Privacy to scan web pages that require user authentication or sit behind access controls — such as customer portals, subscription dashboards, or member-only areas. Without this, login-protected pages are completely invisible to standard cookie scanners, leaving a significant compliance blind spot. Configure the following parameters to allow Secure Privacy's scanner to authenticate and access those restricted areas:
Login page URL
Email / username field ID and value
Password field ID and value
Submit button ID
Username button ID
Action
reCAPTCHA handling
Option to press Enter after entering username or password
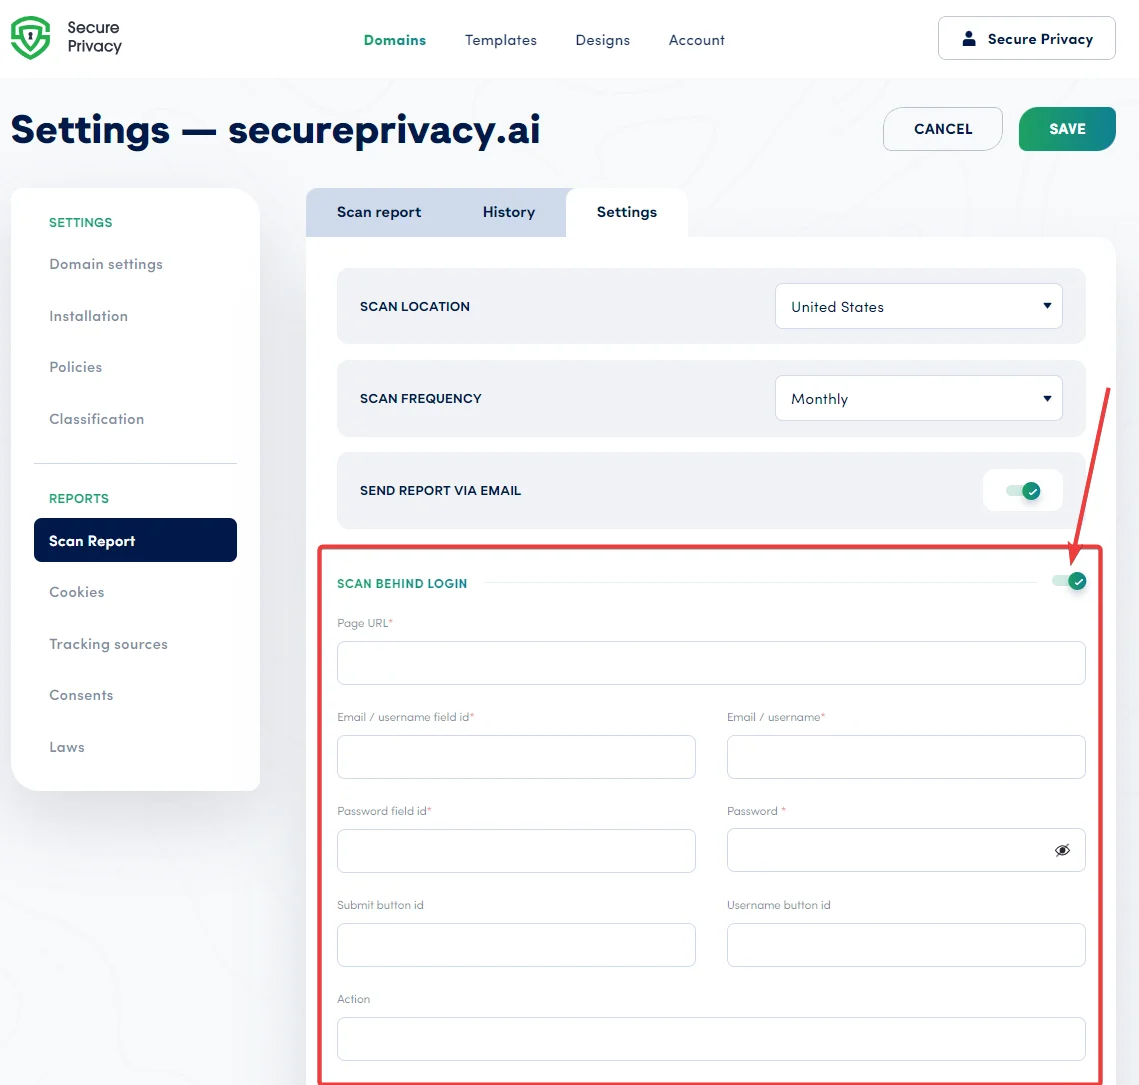
Scan Behind Login configuration — supply your login page credentials so Secure Privacy can audit authenticated areas of your website.
Once configured, Secure Privacy automatically navigates through your login process and scans restricted areas during each audit, giving you a comprehensive compliance report that covers your entire site — not just publicly accessible pages.
Note: The Scan Behind Login feature is available on Advanced and Enterprise plans only. View plan options to upgrade if needed.
Save Your Scan Report Settings
After configuring your preferred options, click the Save button at the top of the settings page to apply and activate your changes. Ensure the settings accurately reflect your website's structure and your compliance obligations — this guarantees that every generated scan report is both comprehensive and directly relevant to your data protection requirements.
What Happens After You Save
Once saved, Secure Privacy will apply your new settings to all subsequent scans for that domain. If you've enabled monthly automated scanning, the next scheduled scan will run according to your configured frequency and location. If you've enabled email delivery, you'll receive a compliance report to your account email address each time a scan completes. You can return to the Settings tab at any time to adjust your configuration as your website changes.
Troubleshooting Common Scan Report Issues
Scan results are missing pages I expect to see
Check the Include/Exclude Pages field to confirm the pages in question haven't been accidentally excluded. Also verify that the pages are publicly accessible from the scan location you've selected — geo-blocked content may not load from a US or EU scan origin.
Scan Behind Login isn't accessing protected pages
Double-check the field IDs for the username, password, and submit button — these must match the exact HTML element IDs in your login form. If your login form uses reCAPTCHA, ensure the reCAPTCHA handling option is configured. Note that this feature requires an Advanced or Enterprise plan.
I'm not receiving scan report emails
Confirm the "Send Report via Email" toggle is enabled and that the email address on your Secure Privacy account is correct. Also check your spam or junk folder, and add the Secure Privacy sending domain to your email allowlist if needed.
Frequently Asked Questions
How do I check if my website cookies are GDPR compliant?
The most reliable way is to use an automated cookie scanner that audits your website from a European Union location and reports every cookie and tracker it finds. Secure Privacy's Scan Report feature does exactly this — configure the Scan Location to EU (Germany), run a scan, and you'll receive a compliance report listing all detected cookies, their categories, and whether they require consent under GDPR.
How often should I scan my website for cookie compliance?
Monthly automated scanning is recommended for most websites. Cookies and trackers change whenever you update plugins, add marketing scripts, or change your ad tech stack. Monthly scans ensure your consent banner and cookie policy stay accurate and up to date without requiring manual audits.
Can Secure Privacy scan pages that require a login?
Yes. The Scan Behind Login feature allows Secure Privacy to authenticate with your website and scan password-protected pages, member areas, and customer portals. This feature is available on Advanced and Enterprise plans and requires you to configure your login page URL, field IDs, and credentials in the Scan Report Settings.
What is the difference between scanning from the US vs. the EU?
Some third-party scripts, advertising networks, and tracking technologies behave differently based on the visitor's geographic location — for example, serving different cookies to EU visitors than to US visitors. Scanning from the EU (Germany) gives you a more accurate view of what GDPR-regulated users actually experience on your site, which is essential for accurate compliance reporting under European privacy law.
Can I exclude certain pages from the cookie scan?
Yes. In the Scan Report Settings, you can enter specific URLs to include or exclude from each scan. Enter multiple URLs as a comma-separated list. This is useful for pages that require special authentication handling, contain sensitive content, or fall outside the scope of your compliance reporting.
Related Articles
How to Add and Verify a Domain in Secure Privacy[?]
Understanding Your Compliance Reports Dashboard[?]