Google now requires websites using Google Ads, Analytics, and other Google tag products to implement consent mode before collecting data from users in regions covered by the GDPR, ePrivacy Directive, and similar privacy laws. Without a properly configured consent management platform (CMP), your Google tags default to restricted data collection — reducing conversion measurement accuracy, limiting remarketing audiences, and leaving gaps in your analytics.
You could wire up consent signals manually with gtag('consent', 'update', ...) calls, maintain your own cookie banner, and hope the implementation stays in sync every time Google updates its consent API. Or you could use a CMP that Google has fully integrated into the Google Tag platform itself — letting you connect, configure, and go live without writing a single line of consent code.
Secure Privacy is one of the CMPs listed as a fully integrated platform inside Google's consent mode setup wizard. That means Google handles the wiring: no manual gtag consent configuration, no extra scripts to maintain, and a free tier to get started. This guide walks you through every step of connecting Secure Privacy as your CMP directly within Google Ads or Google Tag Manager.
Who Is This For
This guide is for website owners, marketing teams, and ad-ops professionals who manage a Google tag (via Google Ads, Google Analytics, or Google Tag Manager) and need to set up Google Consent Mode v2 with a compliant cookie consent banner. It is especially relevant if you are setting up consent mode for the first time or switching from a manual implementation to a fully integrated CMP.
Prerequisites
Access to the Google Ads or Google Tag Manager account that owns the Google tag you want to configure. The tag can be associated with Google Ads, Google Analytics, or any other Google product — the key requirement is admin-level access to the tag itself.
Step-by-Step: Connect Secure Privacy to Your Google Tag
Step 1 — Open the Google Tag Admin Settings
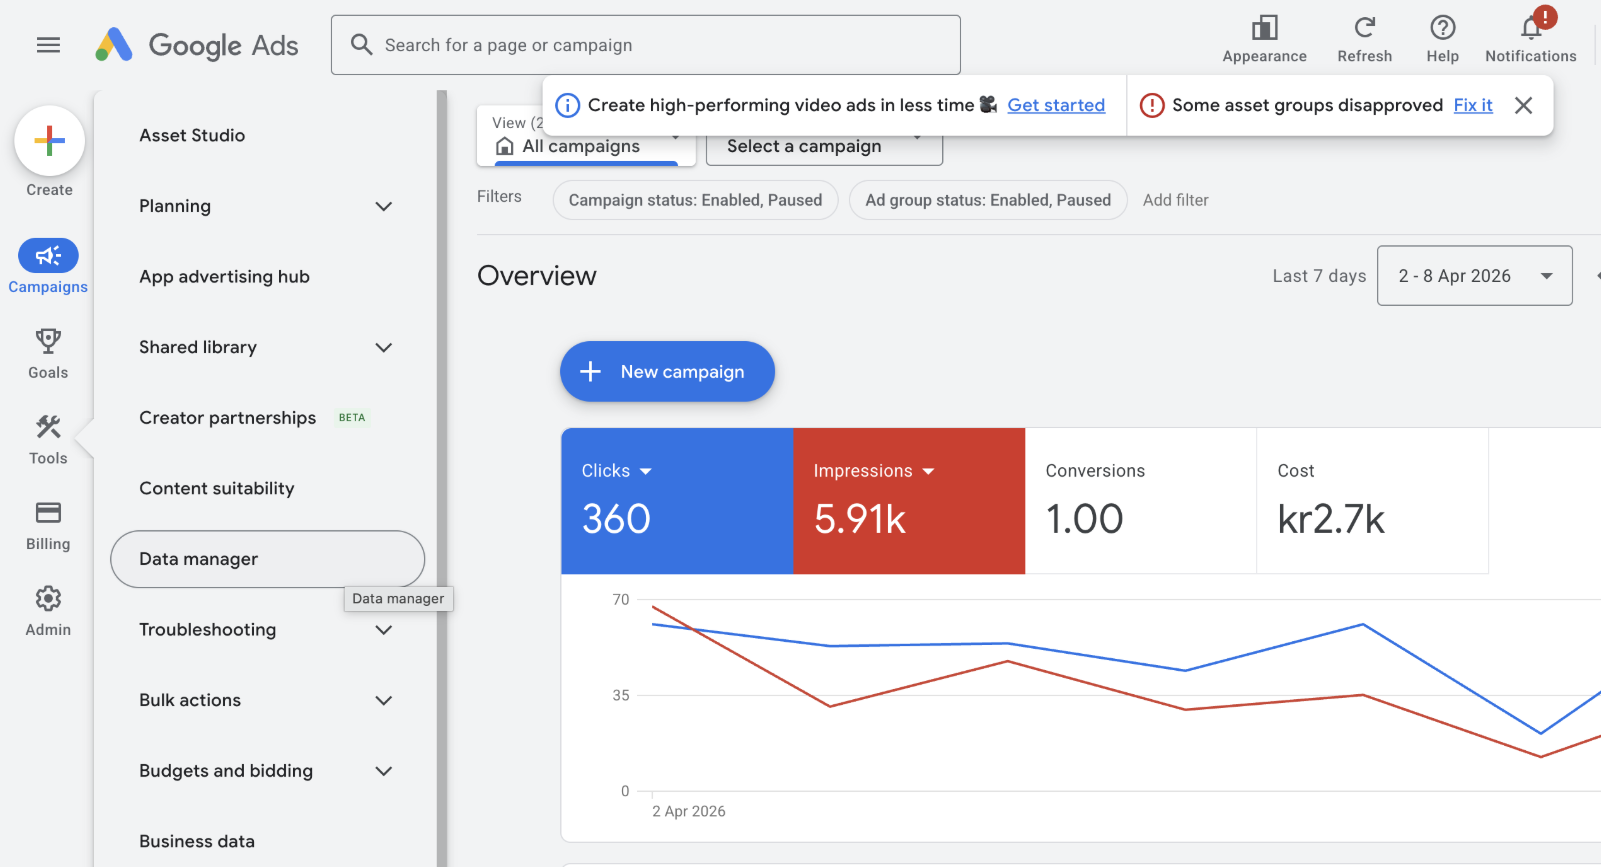
In Google Ads: Navigate to Tools in the left sidebar, then open Data manager. Click into your Google tag to open its settings panel and select the Admin tab along the top.
Google Ads — navigating to the Google tag Admin tab via Data manager.
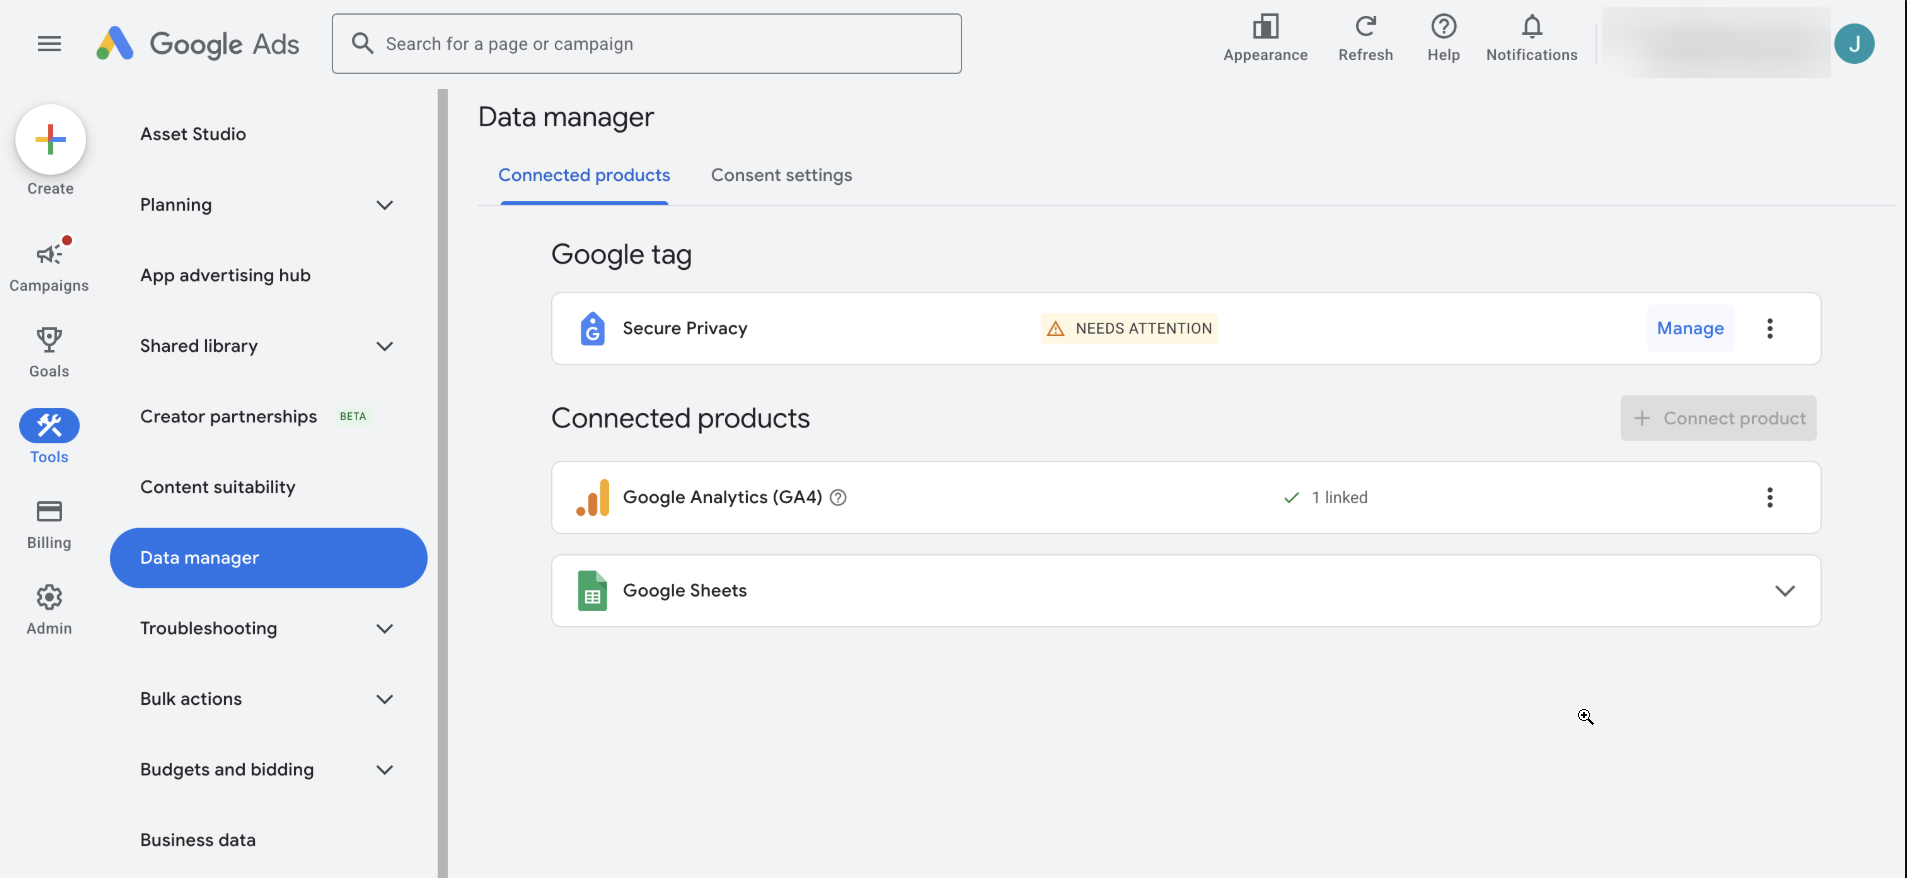
The Google tag panel inside Data manager displays connected products and the Admin tab.
In Google Tag Manager: Navigate to the Google tags tab under your account. Select your tag from the list, click into it, and choose the Admin tab along the top.
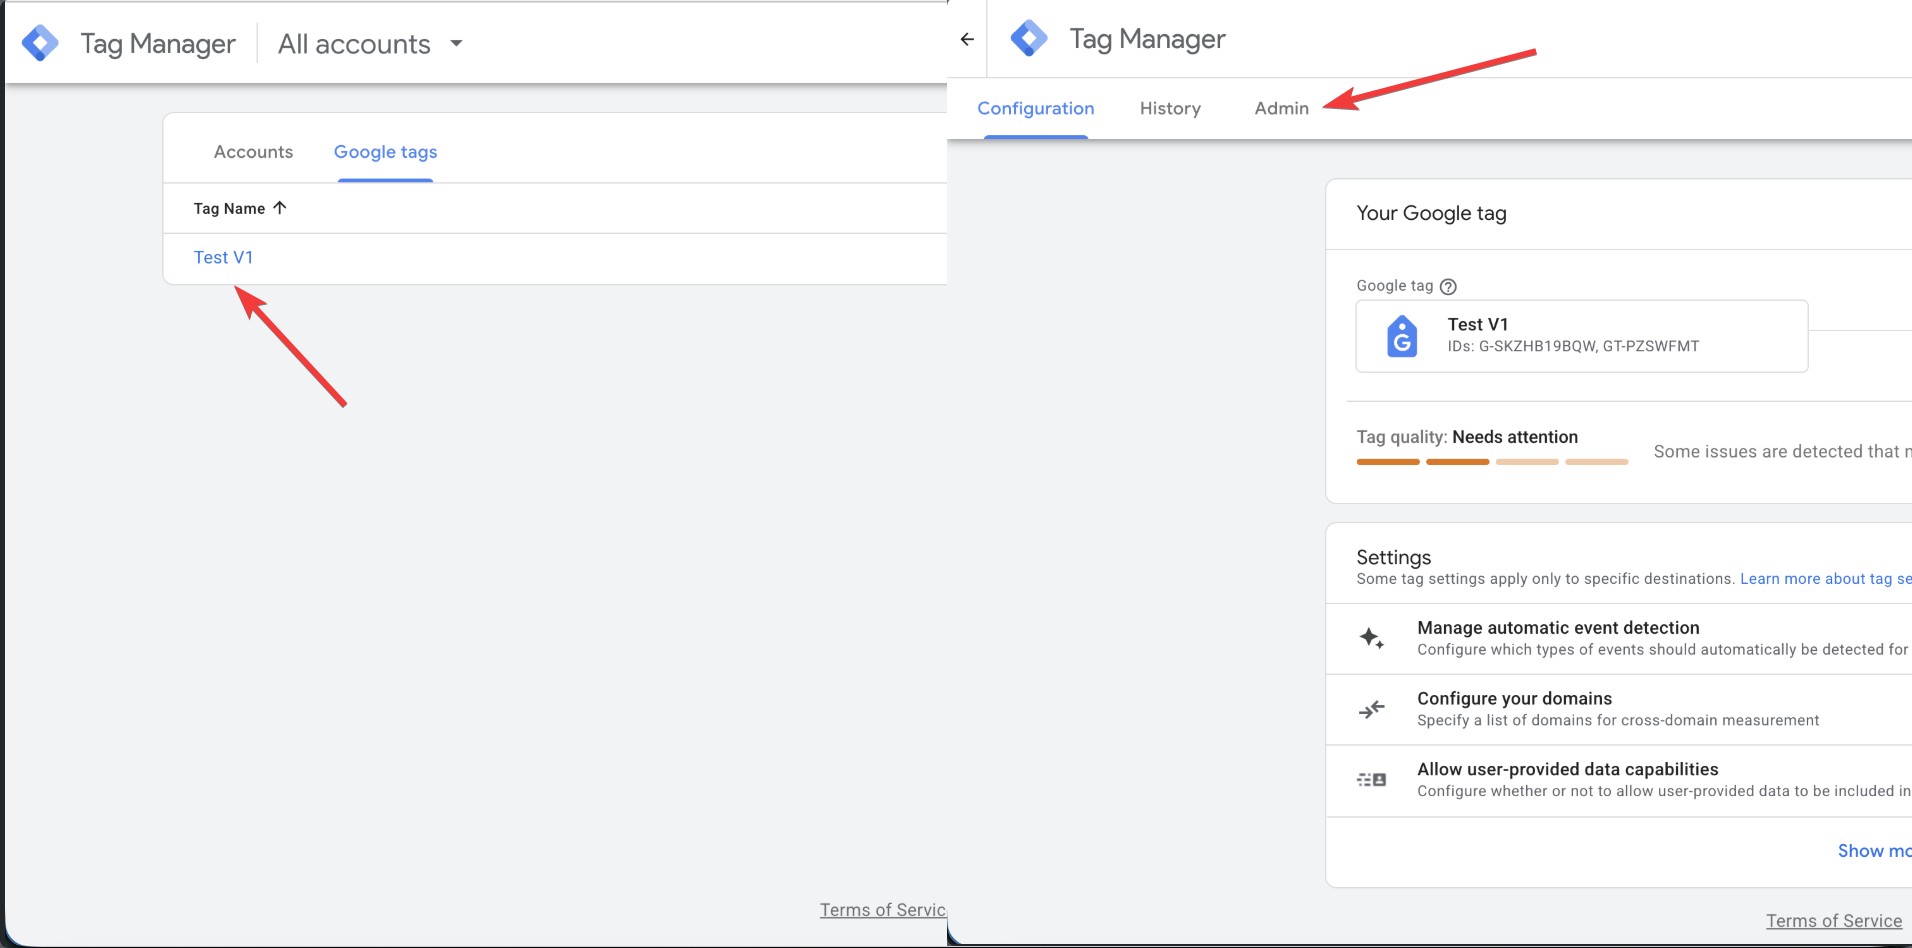
Google Tag Manager — select your tag from the Google tags list.
Step 2 — Click "Set Up Consent Mode"
Under the Google tag management section on the Admin tab (click "Show more" if the option is not showing right away), click Set up consent mode. This opens a setup wizard that walks you through connecting a CMP to your Google tag.
The Admin tab with the "Set up consent mode" option visible under Google tag management.
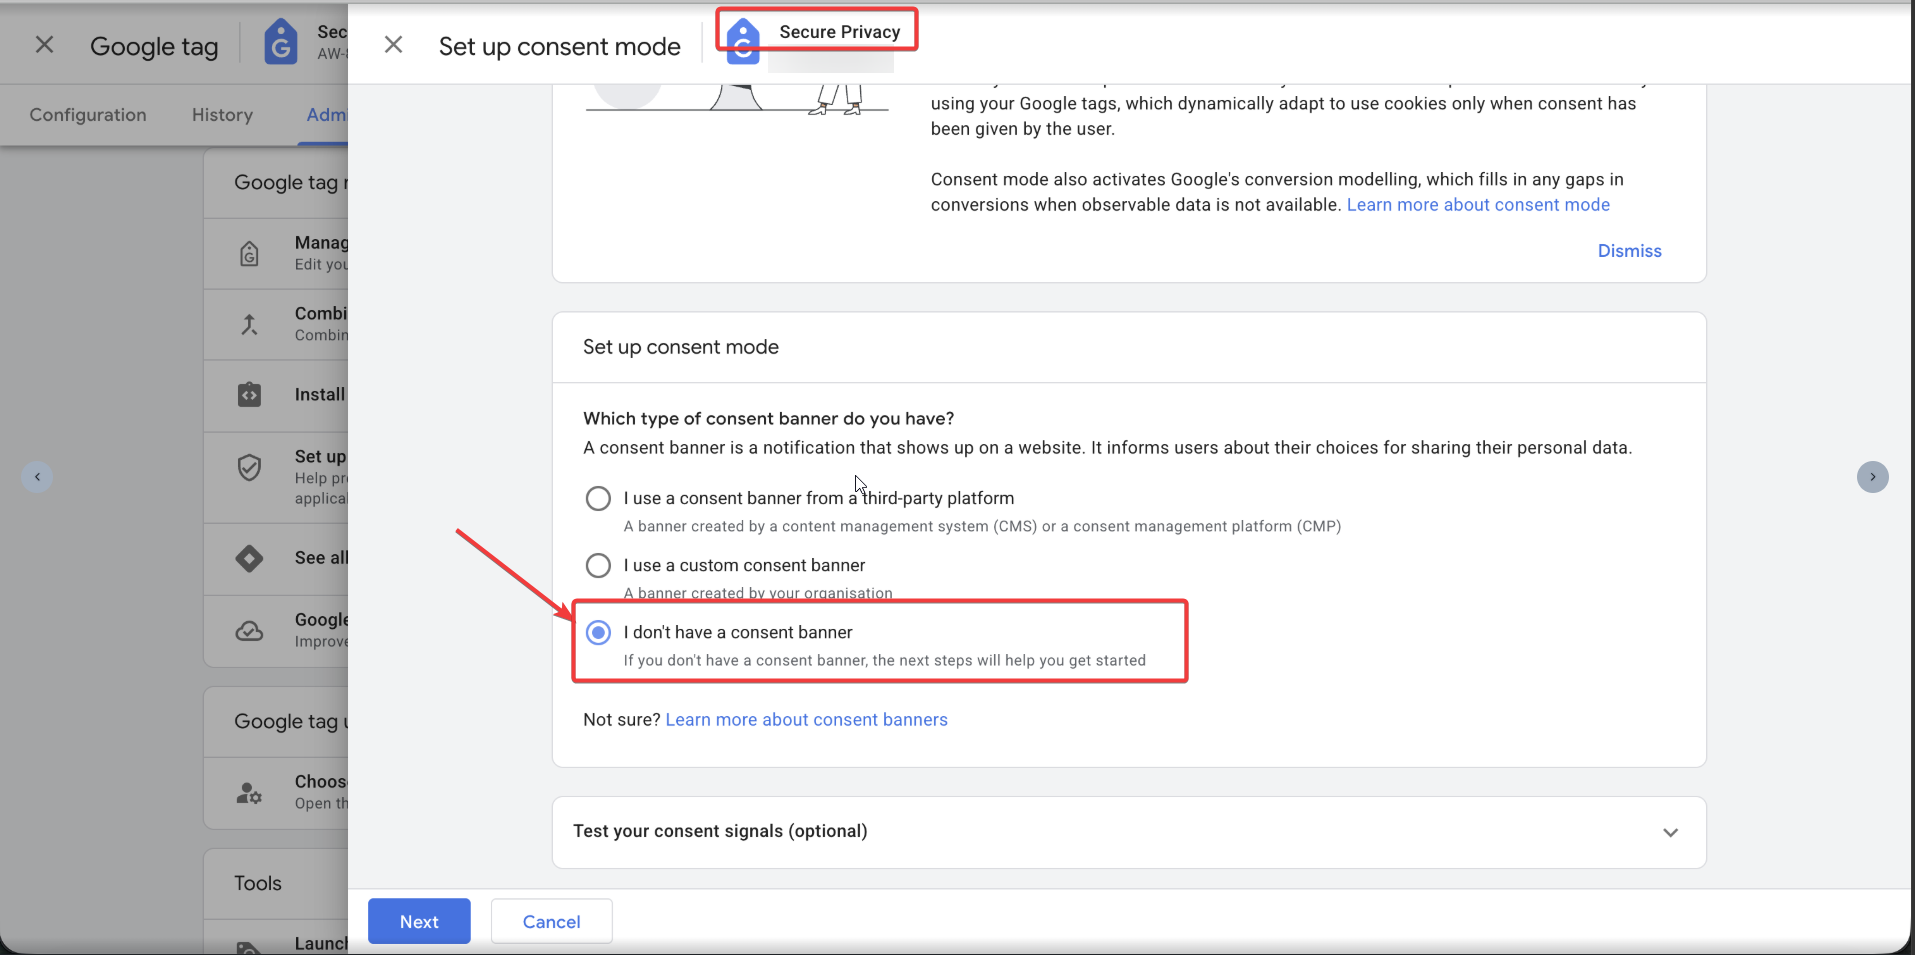
Step 3 — Select Your Consent Banner Type
On the first screen of the wizard you will be asked "Which type of consent banner do you have?" Select "I don't have a consent banner", then click Next. This tells Google you want to set up a new banner through a third-party CMP.

Select "I don't have a consent banner" to proceed with the CMP integration flow.
Step 4 — Open the Third-Party Platform Picker
The next screen, titled "Set a third-party banner," explains the role of consent banners and CMPs. Click the "Select your platform" button to open the platform picker panel. Click "Select your platform" to browse available fully integrated CMPs.
Step 5 — Choose Secure Privacy as Your CMP
A side panel titled "Select a third-party platform (to create your banner)" will appear. Under the Fully integrated platforms section, find and select Secure Privacy (listed with "Free tier available"). Follow any remaining on-screen prompts to complete the integration.
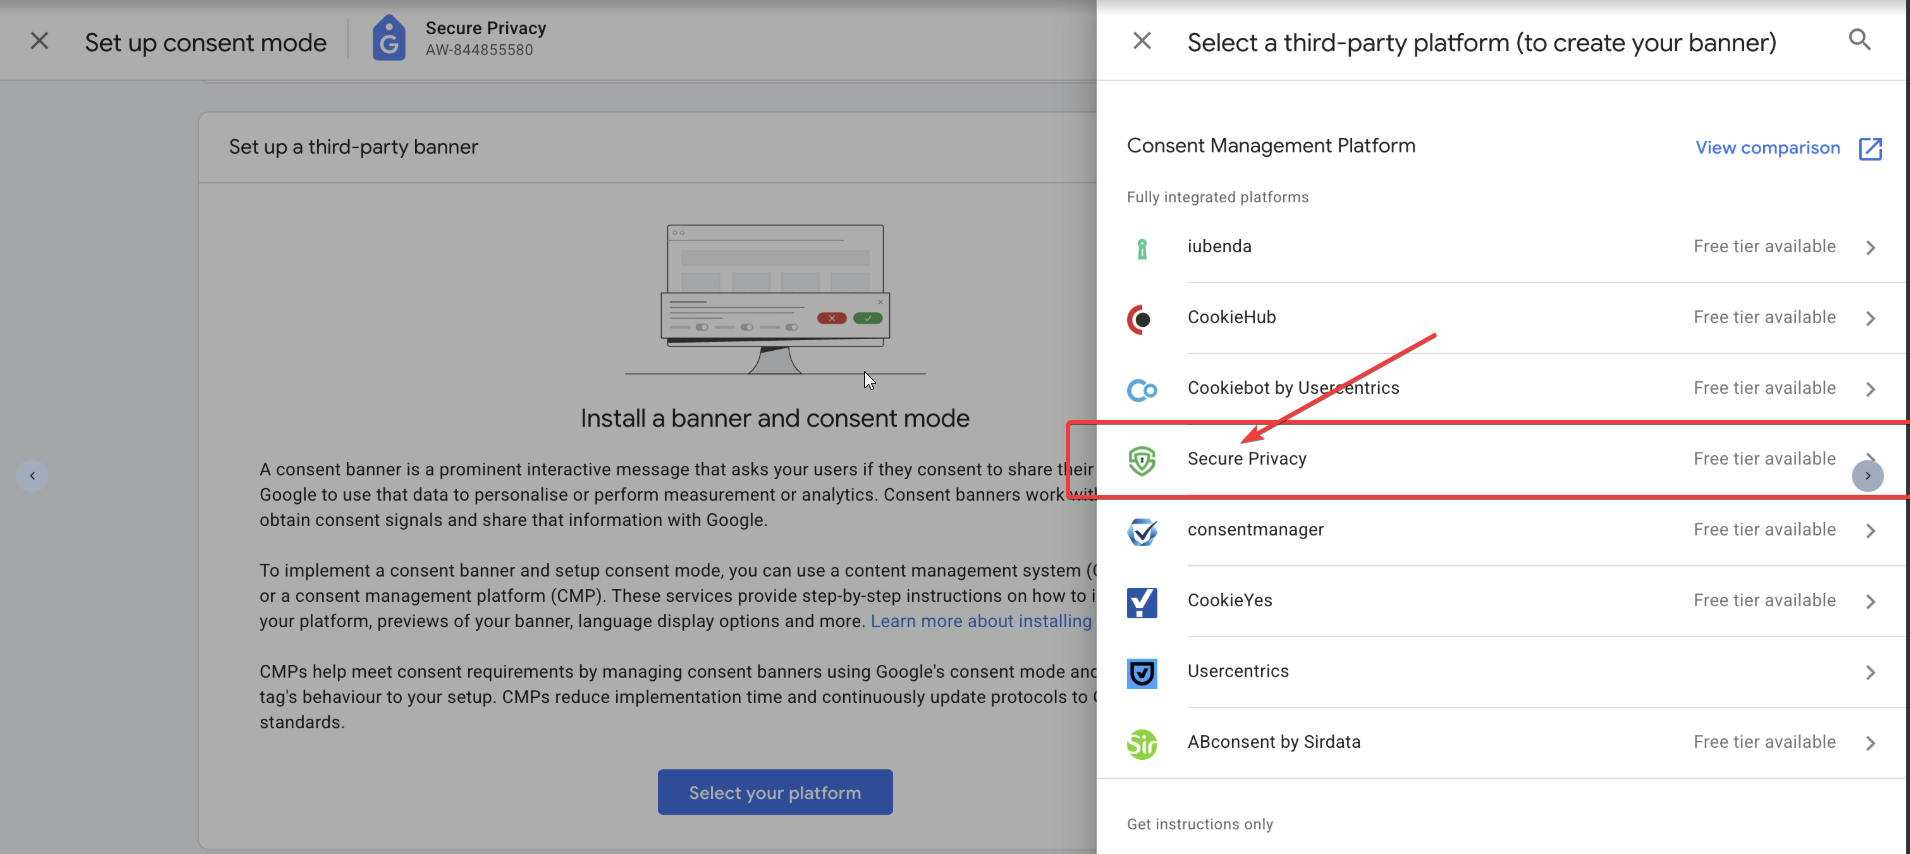
Secure Privacy appears as a fully integrated platform in Google's CMP picker.
Step 6 — Confirm Setup and Publish Your Consent Banner
After selecting Secure Privacy, the wizard confirms your consent signals are active and shows your CMP account details. From this screen you can publish your consent banner by selecting a Google Tag Manager container or installing manually. Choose the publishing method that fits your workflow and follow the on-screen prompts to go live.
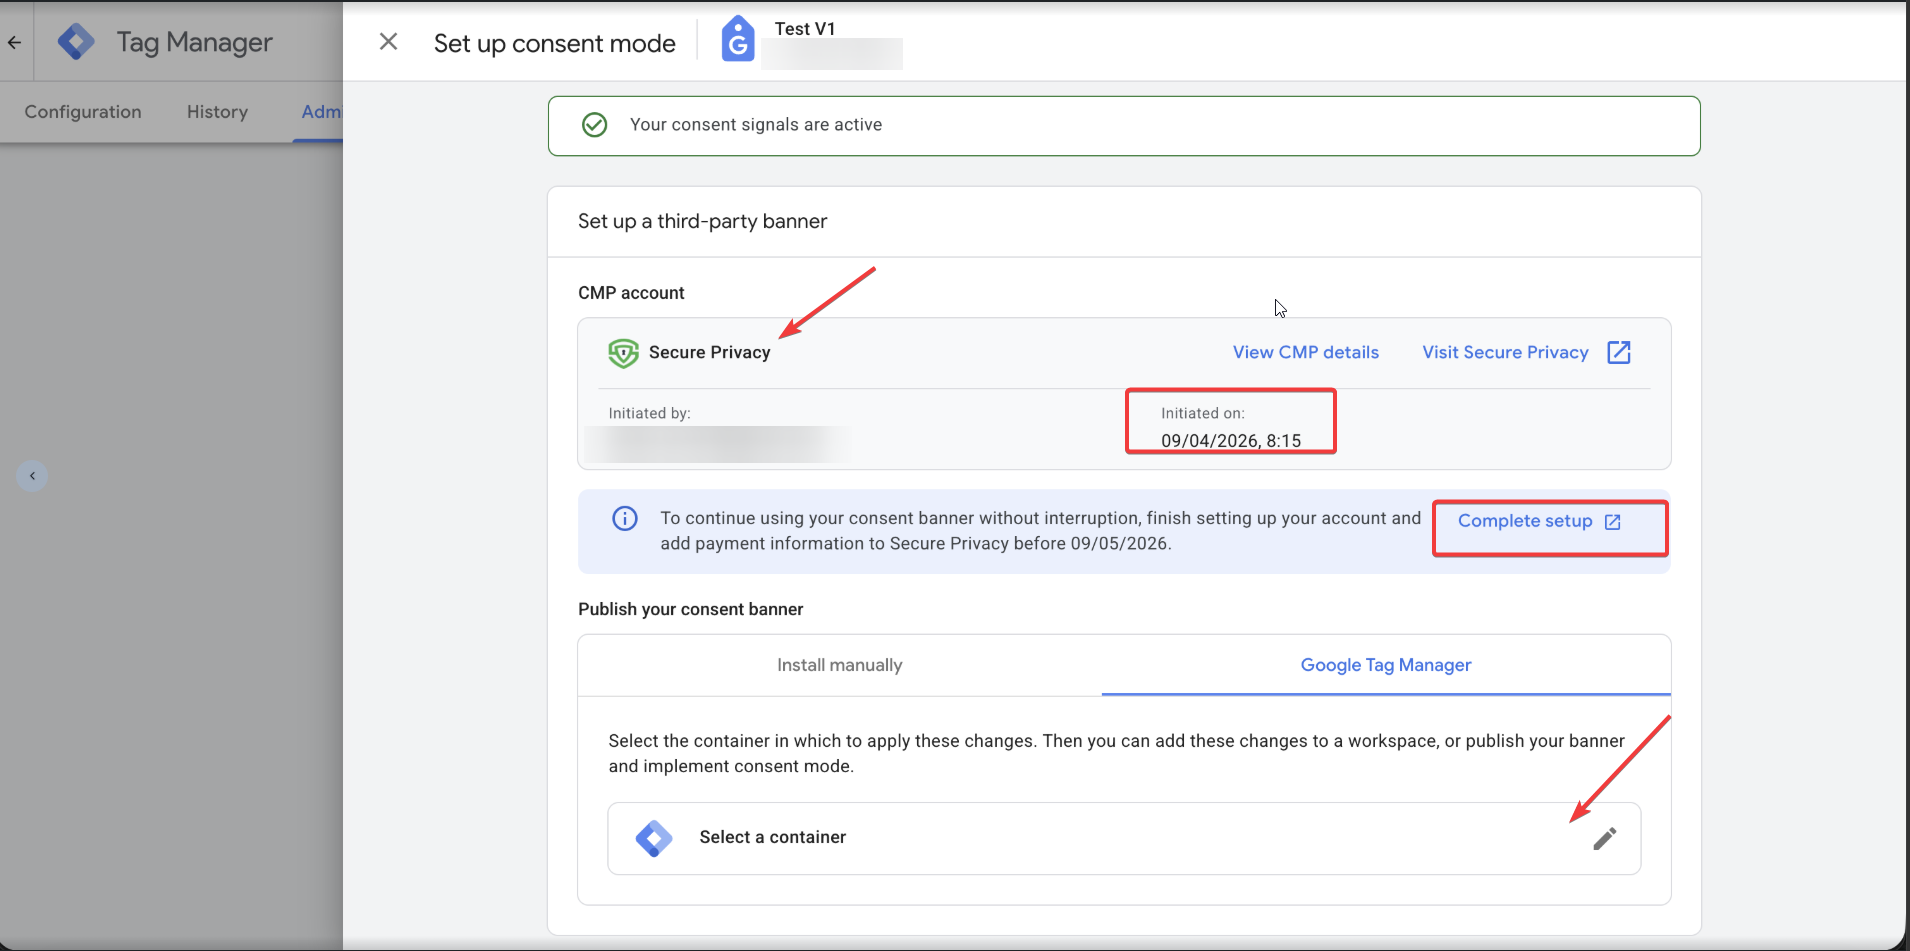
Setup confirmation — Secure Privacy is connected and consent signals are active.
Important Notes and Troubleshooting
Secure Privacy is listed as a fully integrated platform, which means Google has a direct integration path — no manual
gtagconsent configuration is required on your end.If the Google tag gateway shows as "Incomplete" on the Admin page, that is a separate first-party tagging concern and does not block consent mode setup.
After completing setup, use the "Test your consent signals" section (available on the first screen of the wizard) to verify that consent state is being communicated correctly to the Google tag.
If the consent signal test does not detect your banner, confirm that the Secure Privacy script is loading on your site and that you have published the consent banner to the correct domain.
What Happens After Setup
Once Secure Privacy is connected through Google's consent mode wizard, your Google tags will automatically respect the consent choices visitors make through the Secure Privacy cookie banner. Consent signals for ad_storage, analytics_storage, ad_user_data, and ad_personalization are communicated to Google in real time. Google's conversion modeling fills measurement gaps for visitors who decline consent, preserving advertising performance data without compromising privacy compliance.
Frequently Asked Questions
Do I need Google Consent Mode if my site targets EU visitors?
Yes. If your site uses Google tags (Ads, Analytics, or others) and serves visitors in the EU or EEA, implementing consent mode ensures your tags respect user consent choices as required by the GDPR and ePrivacy Directive. Without it, Google restricts data collection by default.
Is Secure Privacy free to use with Google Consent Mode?
Secure Privacy offers a free tier that is available directly through Google's consent mode setup wizard. You can create an account and connect your CMP without leaving the Google Ads or Tag Manager interface.
Do I need to add any code to my site for this integration?
No. Because Secure Privacy is a fully integrated platform in Google's system, the consent mode wiring is handled automatically. You still need to publish the consent banner to your site (either manually or via Google Tag Manager), but no manual gtag('consent', ...) code is required.
What is the difference between a fully integrated CMP and a manual setup?
A fully integrated CMP like Secure Privacy has a direct integration path built into Google's tag platform. Google handles the consent signal configuration automatically. With a manual setup, you must write and maintain your own gtag consent commands, which increases implementation complexity and the risk of misconfiguration.
Related Articles
How the Secure Privacy Cookie Scanner Works[?]