Setting up a Data Subject Access Request (DSAR) form in Secure Privacy ensures your website provides a compliant, user-friendly process for visitors to exercise their rights under GDPR and other privacy regulations. This guide walks through enabling the DSAR form, configuring DPO email notifications, setting up email verification, and customizing form text — all within your Secure Privacy template settings.
Who Is This For?
Privacy officers and compliance teams enabling GDPR-compliant DSAR forms on their websites
Website administrators configuring the Data Request Form within Secure Privacy templates
Developers and DPOs customizing form fields, labels, and email verification settings
How to Set Up DSAR Forms in Secure Privacy
Step 1: Log in to Your Secure Privacy Account
Visit the Secure Privacy login page, enter your credentials, and access your dashboard.

Step 2: Locate the DSAR Feature Under Templates
In your dashboard, navigate to the Templates section and select the compliance template applicable to your website — for example, EU GDPR.
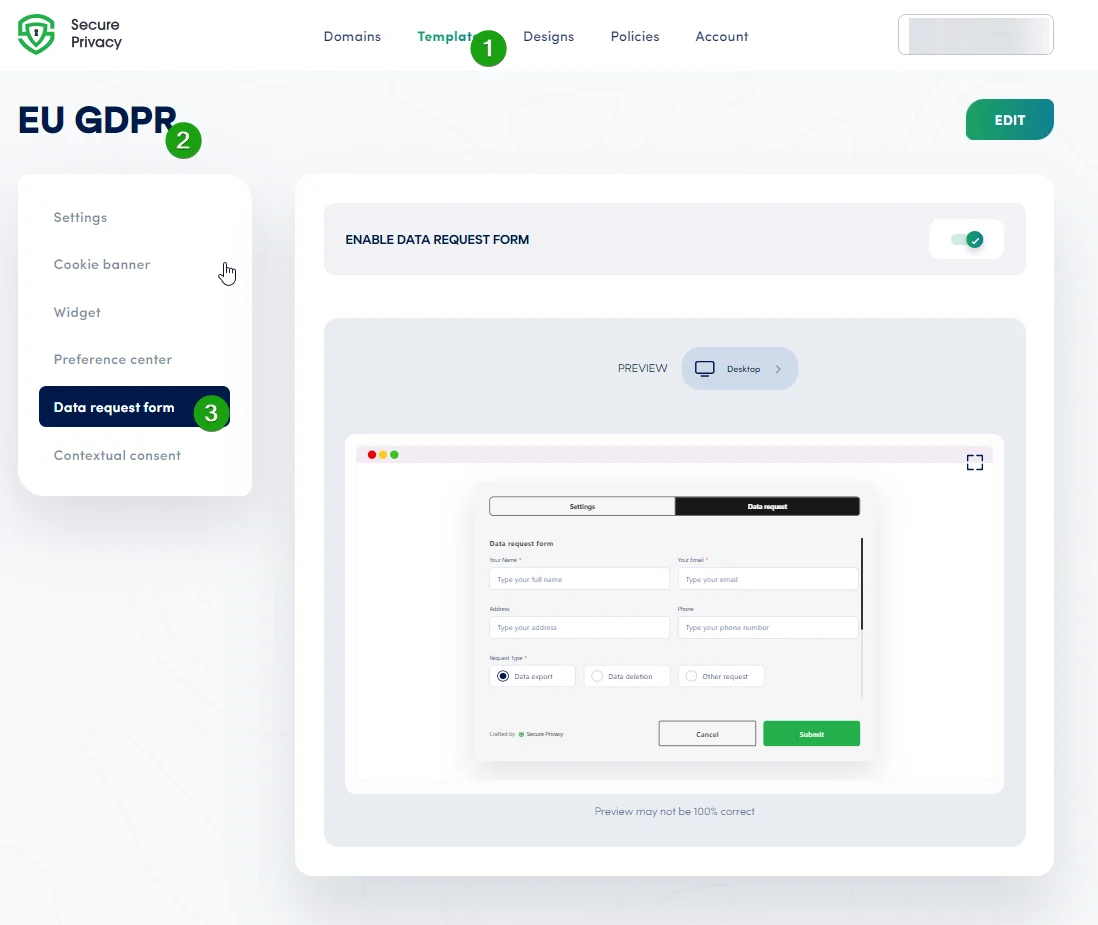
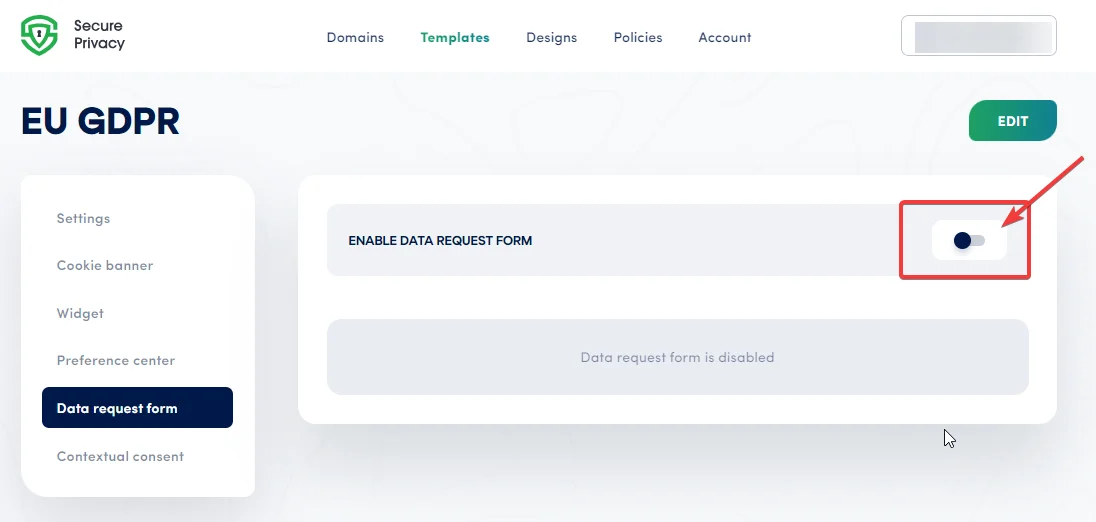
Step 3: Enable the Data Request Form
Within the selected template, locate the Data Request Form option and toggle the Enable Data Request Form switch to ON.
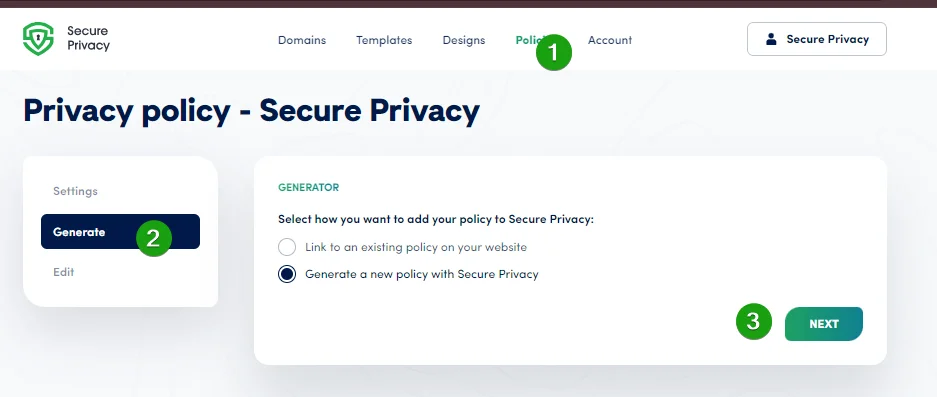
Step 4: Configure the DPO Email at the Policies Level
Navigate to the Policies screen and select the appropriate policy for your domain. Click Generate or Next, then toggle the Data Protection Officer switch to enter the DPO's name and email address. This ensures DSAR notifications are routed to the correct person in your organization.
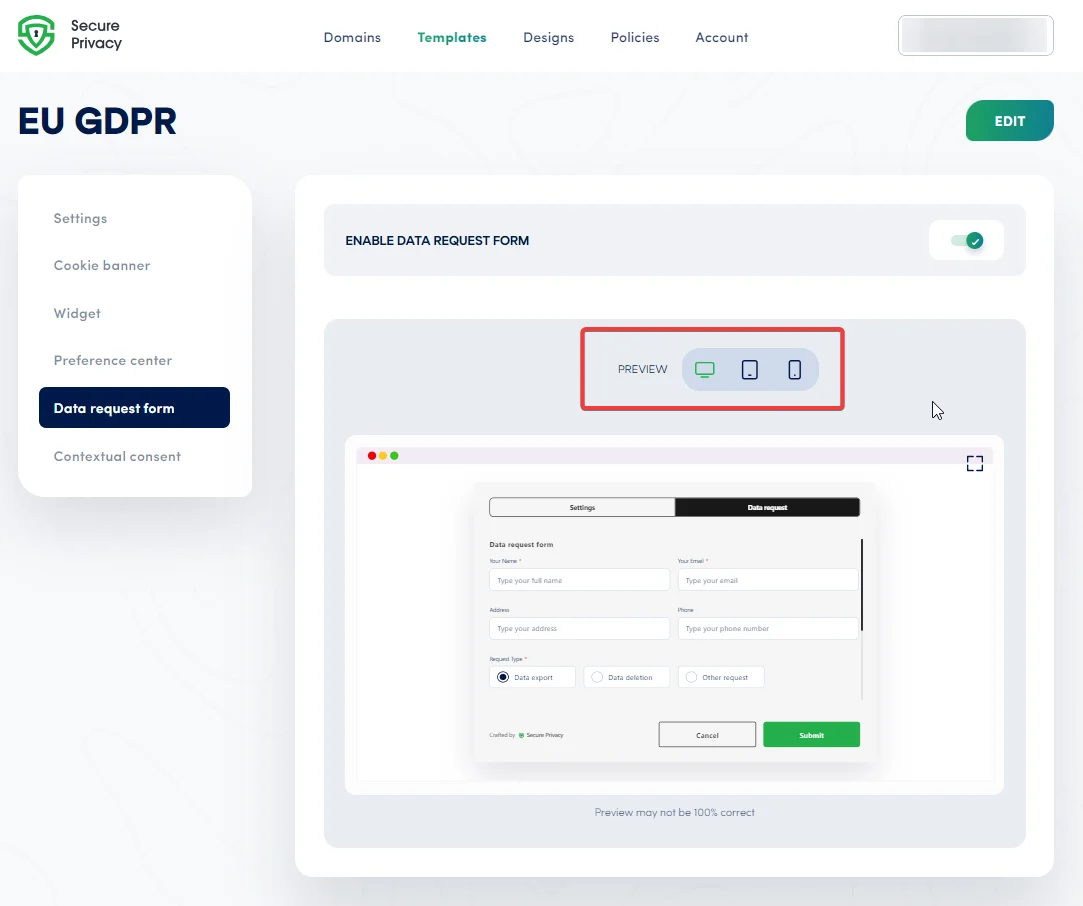
Step 5: Preview Your Data Request Form
Use the Preview button to review how the DSAR form appears across device types — Desktop, Tablet, and Mobile. Note that previews are approximate and may vary slightly from the live appearance on specific browsers and devices.
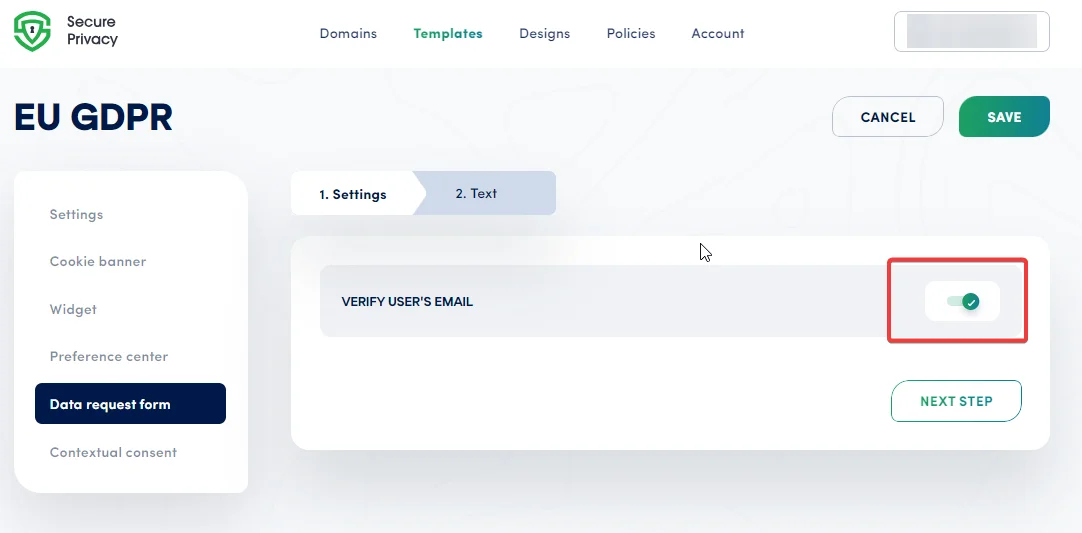
Step 6: Enable Email Verification for Data Integrity
Enable email verification to confirm the identity of requesters before their DSAR is processed — reducing the risk of fraudulent or unauthorized requests:
In the Data Request Form settings, toggle Verify User's Email to ON.
When enabled, submitters will receive an email verification link they must click before their request is forwarded to your DPO.
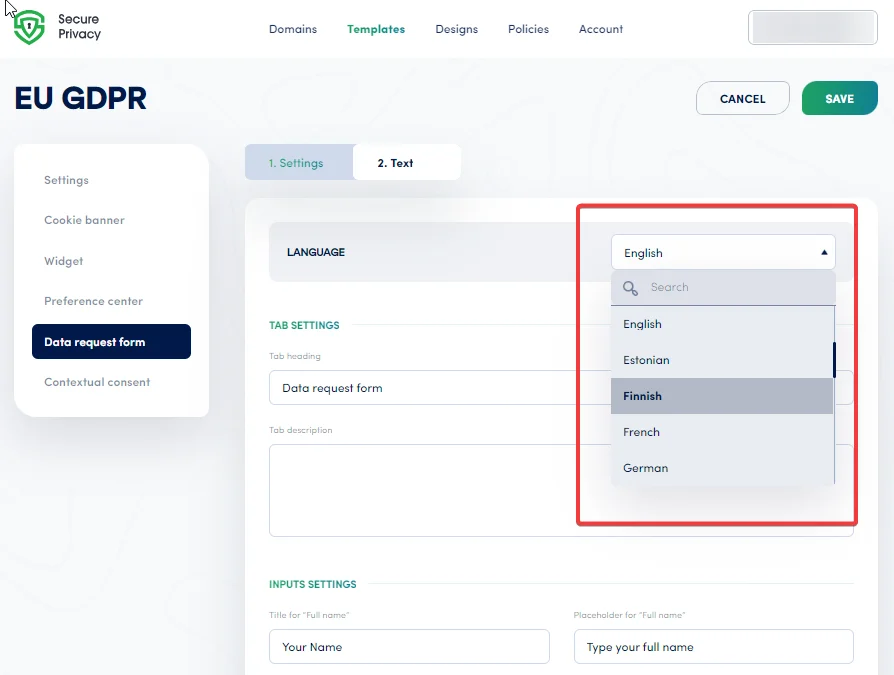
Step 7: Customize Form Text and Labels
Edit the DSAR form's text content to match your organization's language and branding. Available customization options include:
Select the display language for the form
Modify the tab heading and description
Set field labels for full name, email, address, phone number, and message
Customize labels for request types — data export, deletion, and other request categories
Edit contact section titles and descriptive text
Customize the submit button label
Frequently Asked Questions
The DSAR form is not displaying on my website — what should I check?
Confirm that the Data Request Form toggle is set to ON within your selected compliance template and that your changes have been saved. Also verify that the Secure Privacy script is correctly installed on your website and that the template is assigned to the correct domain in your account settings.
Visitors are not receiving the email verification link — how do I fix this?
Check that the Verify User's Email toggle is enabled in the DSAR form settings. Also verify that your SMTP configuration is correctly set up and that outbound email from Secure Privacy is not being blocked by spam filters. Ask a test submitter to check their junk or spam folder if the verification email is not arriving in the inbox.
My text customizations are not appearing on the live form — what should I do?
Ensure all changes have been saved in the template settings before previewing. Clear your browser cache and your website's CDN or server cache, then reload the page in an incognito window to verify the updated text is displaying. If the issue persists, contact [email protected] for assistance.
See Also
If you have questions or need further assistance, contact [email protected].